YOURLS with nginx on Mac OSX 10.8.4

I had some interest in link shorteners and found YOURLS, a php package which allows you to set up your own link shortening service.

I used brew to install the required components – mysql and php54.  For php54 you want to get php-fpm, mysql and no apache. Dont miss createing the symlink /usr/sbin/php-fpm to the new php-fpm that brew installs:

http://shanelogsdon.com/installing-nginx-percona-php-fpm-with-homebrew-on-mountain-lion

If you have trouble with the brew formula for php54, take a look and try this:

https://github.com/josegonzalez/homebrew-php#installation

And now you can start php-fpm:

php-fpm

When you setup mysql, you’ll have to start the mysql server, then add the user “root” with password “root”.  Also, you have to create a blank database called “yourls”.

YOURLS assumes you are going to use apache but I decided to use nginx on my mac instead.  I also used brew to install nginx.

Then installed the php sources for YOURLS:

git clone https://github.com/YOURLS/YOURLS.git

I created an nginx configuration in the YOURLS repo:

cd YOURLS
mkdir nginx
cp -r /usr/local/etc/nginx ./nginx
cd nginx
mkdir log

The nginx.conf:

worker_processes 1;
events {
 worker_connections 1024;
}
http {
 include mime.types;
 default_type application/octet-stream;
 sendfile on;
 keepalive_timeout 65;
server {
 listen 3030;
 server_name localhost;
 access_log /Users/lkang/msrc/YOURLS/nginx/log/access.log;
 error_log /Users/lkang/msrc/YOURLS/nginx/log/error.log;
 root /Users/lkang/msrc/YOURLS;
 index index.php;
  location / {
    try_files $uri $uri/ /yourls-loader.php =404;
if (!-e $request_filename) {
 rewrite ^/([0-9a-z-\+]+)/?$ /yourls-loader.php?id=$1 last;
 }
 }
 location ~ \.php$ {
 fastcgi_pass 127.0.0.1:9000;
 fastcgi_index index.php;
 fastcgi_param SCRIPT_FILENAME $document_root$fastcgi_script_name;
 include /Users/lkang/msrc/YOURLS/nginx/fastcgi_params;
 }
 }
 }

I used these two pages (as well as the nginx docs) to setup nginx.conf:

http://packetcollision.com/2012/01/27/yourls-and-nginx-an-updated-config/
http://foolrulez.org/blog/2009/08/foolz-us-make-yourls-work-on-nginx/

And now you can start nginx:

nginx -c ~/YOURLS/nginx/nginx.conf

In the YOURLS/user directory, you’ll have to copy the config-sample.php to config.php and edit some values:

define( 'YOURLS_DB_USER', 'root' );
define( 'YOURLS_DB_PASS', 'root' );
define( 'YOURLS_DB_NAME', 'yourls' );
define( 'YOURLS_DB_HOST', 'localhost:3306' ); #3306 is the default mysql port
define( 'YOURLS_SITE', 'http://localhost:3030' ); # I've chosen 3030 as the local port for YOURLS

At this point YOURLS should work. In your browser, enter “localhost:3030/admin”  and you should see a link to “install”.  Press it and it will create your database tables.

From the same url “localhost:3030/admin” you should be able to login with “username” / “password” and create shortened links.   After creating a shortened link, “localhost:3030/<shortened_link> should redirect you to the site whose link you shortened.

Also, “localhost:3030/readme.html” should show you the same page as “http://yourls.org/&#8221;.

Troubleshooting

I had some issues getting YOURLS up and running.  Configuration of nginx was probably the biggest set of issues to work through, followed by mysql installation and php-fpm installation.

In some cases reconfiguration/restart of nginx would not fix a config error until the browser cache was cleared.

After mysql is up, it’s good to check that the database is actually there.

mysql -u root -p
mysql> show databases;
+--------------------+
| Database |
+--------------------+
| information_schema |
| mysql |
| performance_schema |
| test |
| yourls |
+--------------------+
5 rows in set (0.00 sec)
mysql> use yourls;
Database changed
mysql> show tables;
+------------------+
| Tables_in_yourls |
+------------------+
| yourls_log |
| yourls_options |
| yourls_url |
+------------------+
3 rows in set (0.00 sec)
mysql>

YOURLS has a cool plugin interface which allows you to write functions that will trigger on certain “actions”, or modify intermediate values with “filters”.  There are several already available at https://github.com/YOURLS/YOURLS/wiki/Plugin-List.

It turned that the plugin capability helped debugging quite a bit.  I wrote a plugin which printed out “action” triggers so I could trace execution of the php scripts that were running.  It’s pretty easy to find actions being triggered throughout the code.  The output goes to the rendered page and to a logfile, which was useful when redirection wasnt working properly.
https://github.com/lkang/yourls_action_log

Statsd, Rails and Graphite

This is part 2 of a post on establishing metrics monitoring system for a Rails application.

Statsd was relatively easy to get working. Cloning the etsy/statsd project from github and prepping it with npm,

git clone https://github.com/etsy/statsd.git

npm install

At this point it’s necessary to configure statsd to talk to carbon, the data aggregation component for graphite.  By default, the port for carbon is 2003. My graphite hostname is “graphite” so that’s been changed.

cd statsd
cp exampleConfig.js myConfig.js
vi myConfig.js
graphitePort: 2003
, graphiteHost: "graphite"
, port: 8125

Starting statsd is simple at this point,

node stats.js myConfig.js

The last part is to start carbon

cd /opt/graphite
./bin/carbon-cache.py start

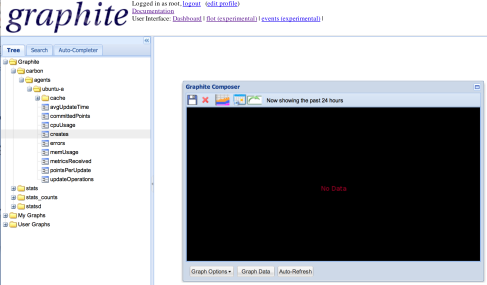
At this point the system should be working.  Statsd should be feeding carbon with system related data which should be viewable at graphite. Drilling down into carbon on the left nav should show some system stats that can be graphed.

Image

Application data can be input by using the statsd/examples helpers. To do a manual test, try running the command line client to put some data into the system

./statsd-client.sh 'my_metric:100|g'

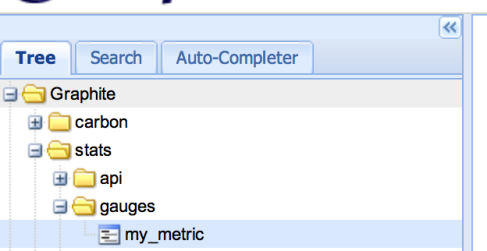
This will put data in the left navigation:

Image

By default, statsd-client.sh tries to find statsd at localhost, but this can be edited to send metrics the statsd host from anywhere.

In my application I used the ruby-example2.rb.  I renamed it and placed it at lib/statsd.rb in my project and created config/statsd.yml with my statsd host info,

production:
 host: statsd #statsd is my statsd hostname
 port: 8125
development:
 host: statsd #statsd is my statsd hostname
 port: 8125

then edited config/environments/development.rb to initialize the Statsd class in the Application.configure block:

Statsd.config

I wanted to count how many requests were coming in so in app/controllers/application_controller.rb I added:

before_filter :count_requests
def count_requests
 puts "****** Incrementing stats for website.request"
 Statsd.increment('website.request')
 end

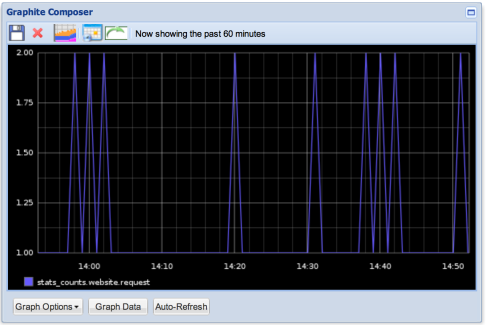
After bringing up my site and hitting a few pages to input some request counts, I was able to graph the number of requests at graphite:

Image

One nice thing is that any param can be added dynamically just by adding Statsd.increment(‘new_param’) in the application code. No more configuration of statsd or carbon is necessary, and it will be available to graph at graphite.

The data key can be a variable, for example if I want to track data by hostname I would use

Statsd.increment( "#{hostname}.#{param}")

The other nice thing is that data is aggregated at the statsd server, so I can have several rails processes on several boxes all pointing their data at the statsd server.

It’s also possible to sample the data sent to the server by using the second optional sample rate param:

Statsd.increment( 'new_param', 0.1 )

This will send only 1/10 the data to the server.  An estimation of the actual value of the param will be made by statsd.

Graphite Installation

I read two posts on using statsd and graphite, then decided to try getting it installed on my system.

http://37signals.com/svn/posts/3091-pssst-your-rails-application-has-a-secret-to-tell-you
http://codeascraft.etsy.com/2011/02/15/measure-anything-measure-everything/

Installing graphite took longer than expected. Issues with tagging and getting the webserver configured and finally getting permissions on the storage directory correct took some time to figure out. I started with an ubuntu 10 system with python 2.7 and apache2 already installed, then followed instructions at http://graphite.wikidot.com/downloads

sudo pip install carbon
sudo pip install whiper
sudo pip install graphite-web

then here:

http://graphite.wikidot.com/installation

The pip install allowed me to skip all the steps until this:

python setup.py install

and this gave me issues.

statsdImportError: cannot import name parse_lookup

The problem was in the django-tagging lib. pip install tagging ends up grabbing version 0.2.1, which still has the issue.  I had to retrieve version 0.4.1 from the svn trunk and build it, thanks to this post.

https://groups.google.com/forum/#!msg/django-users/vzxb6y2IewE/8jHyJC1RIkkJ

I also had to install django version 1.3

sudo pip install -Iv django==1.3

and configuration files for storage needed to be copied:

cd /opt/graphite/conf
cp carbon.conf.example carbon.conf
cp storage-schemas.conf.example storage-schemas.conf

Now the command ‘python setup.py install’ worked without error msgs.

Some manual setup was necessary for apache2.

cd opt/graphite/conf
cp graphite.wsgi.example graphite.wsgi

and installation of mod_wsgi was necessary

sudo apt-get install mod_wsgi

and setting up the apache virtual host:

cp /opt/graphite/examples/example-graphite-vhost.conf /etc/apache2/sites-available
cd /etc/apache2/sites-enabled
ln -s ../sites-available/example-graphite-vhost.conf
Everything was ready, so I hit my browser: http://graphite and got – 500!

Looking at the /var/log/apache2/error.log –

[Sun Sep 09 14:59:33 2012] [alert] (2)No such file or directory: mod_wsgi (pid=4272): Couldn't bind unix domain socket '/etc/apache2/run/wsgi.4272.0.1.sock'.

This turned out to be a problem with /etc/apache2/sites-available/example-graphite-vhost.conf. /etc/apache2/run didnt exist.  Changing the default configuration for the directive WSGISocketPrefix fixed it.

#WSGISocketPrefix run/wsgi
WSGISocketPrefix /var/run/apache2/wsgi

A couple other spots in this file are marked by

# XXX You need to set this up!

and so heeding this advice, proceeded to setup the /opt/graphite/conf/graphite.wsgi file:

cp /opt/graphite/conf/graphite.wsgi.example /opt/graphite/conf/graphite.wsgi

and changed the directive

Alias /media/ "/usr/local/lib/python2.7/dist-packages/django/contrib/admin/media/"

After sudo /var/init.d/apache2 restart, 500 errors again, but not from /etc/log/apache2/error.log.  This time looking at /opt/graphite/storage/log/webapp/error.log:

IOError: [Errno 13] Permission denied: '/opt/graphite/storage/log/webapp/info.log'

In order to fix this,

cd /opt/graphite/storage/log
sudo chmod a+w webapp

But:

IOError: [Errno 13] Permission denied: '/opt/graphite/storage/index'

and so

sudo chmod -R a+w /opt/graphite/storage

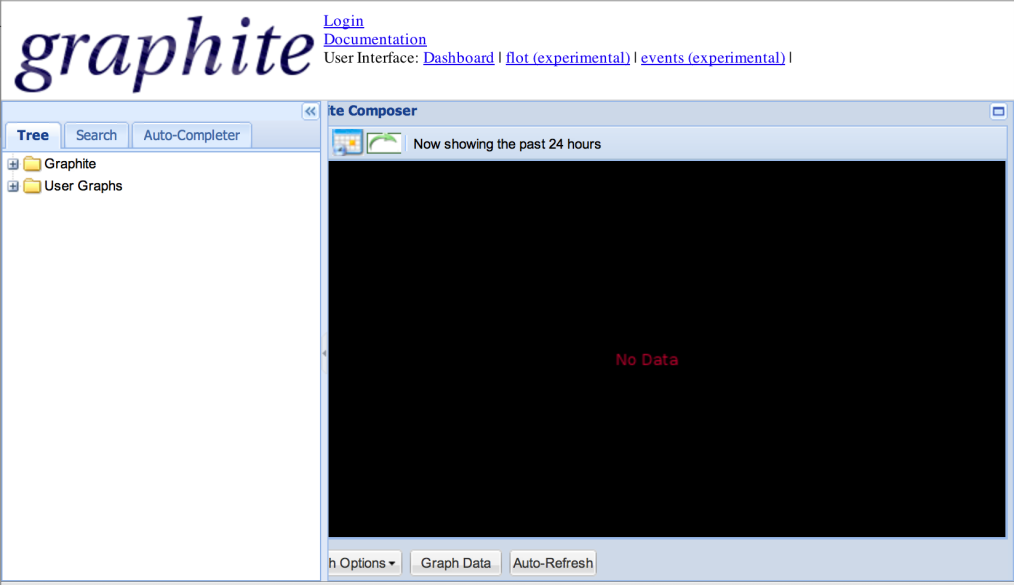
Image

And this finally resulted in success!  Part 2 will be about setting up statsd and injecting data.

Building gource on Mac OSX Lion

I wanted to use gource to visualize source code changes on some of our projects. The source is on Github, so I cloned it:

git clone https://github.com/acaudwell/Gource.git

and ended up with the last commit 46243b04364a99fb1a21a11998f53db0914cc249 on the master branch.

Using macports I had to install a number of packages:

sudo port install autoconf
sudo port install <all the packages called out by INSTALL>

All fine so far, but after running autogen.sh and then configure, errors appeared:

...
checking for boostlib >= 1.46... yes
 checking whether the Boost::System library is available... yes
 ./configure: line 7374: tac: command not found
 ./configure: line 7374: tac: command not found
 checking whether the Boost::Filesystem library is available... yes
 ./configure: line 7613: tac: command not found
 ./configure: line 7613: tac: command not found
 configure: error: Could not link against -lGL !

tac is not part of Mac OS, so I faked it by adding this to configure:

tac () {
 awk '1 { last = NR; line[last] = $0; } END { for (i = last; i > 0; i--) { print line[i]; } }'
}

then ran configure again but another error appeared:

checking for exit in -llibboost_system-mt.a... no
configure: error: Could not link against libboost_system-mt.a !

Fixed this by changing m4/ax_boost_filesystem.m4 and m4/ax_boost_system.m4:

- ax_lib=${libextension}
+ ax_lib=`$as_echo "$libextension" | sed -e's/^lib//' | sed -e's/\..*$//'`

Then running autogen.sh and re-editing configure to add tac(), running configure was finally successful!  Running make then produced the working gource executable.

Thanks to this link for the tac replacement:

http://tipstricks.itmatrix.eu/?p=305

git on raspberry pi

change partitions to use the entire 16Gb SD card

http://elinux.org/RPi_Resize_Flash_Partitions

give it a 1Gb swap file

http://serverfault.com/questions/218122/how-do-i-increase-swap-memory-in-debian

And now I want to get some code onto the system from github.  So I have to install git first:

sudo apt-get install git-core

But oops:

Err http://ftp.uk.debian.org/debian/ squeeze/main openssl armel 0.9.8o-4squeeze7
 404 Not Found

So I need to update apt-get’s sources.list to use us instead of uk sources.

sudo vi /etc/apt/sources.list
deb http://ftp.us.debian.org./debian/ squeeze main non-free

Then

sudo apt-get update

and try again

sudo apt-get install git-core

ah, this time it works.

Now to get OpenNI and Sensor

git clone https://github.com/OpenNI/OpenNI.git
git clone https://github.com/PrimeSense/Sensor.git

And start building OpenNI first. This takes some work – comment out the java and .net targets, and the GLES targets.

Then build Sensor.

Oh and I have to use change Makefile.Arm to use the right ARM options –

CFLAGS += -cpu=arm1176jzf-s

Starting up the Raspberry Pi

I finally received two Raspberry Pi model B boards. I was excited to get started and it didnt take long to get the thing up and running the demos, connected to the internet and browsing the web. Here the steps I took to check it out.

After scrounging around for peripherals,

4 GB class 4 SD card
5v power supply (micro usb connector), 700 ma
usb keyboard and mouse
hdmi cable to my hdtv
network cable connected to my macbook pro

it was time to set up a boot image on the SD card. Using my macbook pro, I downloaded “squeeze”

http://www.raspberrypi.org/downloads

then followed instructions from here:

http://elinux.org/RPi_Easy_SD_Card_Setup

to create a bootable SD card.

After connecting the Rpi to the peripherals and inserting the SD card, plugged in the power – it immediately displayed boot messages to the TV and soon settled at the login prompt.

Login with pi/raspberry, the default.

It’s just a little unix computer after all.

$ df
 Filesystem 1K-blocks Used Available Use% Mounted on
 tmpfs 95416 0 95416 0% /lib/init/rw
 udev 10240 136 10104 2% /dev
 tmpfs 95416 0 95416 0% /dev/shm
 rootfs 1602528 1204660 316460 80% /
 /dev/mmcblk0p1 76186 28625 47561 38% /boot

Even though it is a 4 GB card, it was partitioned only for 2 GB.

There are some demos which can show a bit of the Rpi capability. These are in /opt/vc/src/hello_pi/hello*

$ cd /opt/vc/src/hello_pi
 $ cd /hello_triangle
 $ make
 $ ./hello_triangle.bin

This starts a demo of a rotating cube with images bitmapped to the faces.

$ cd ../hello_video; make; ./hello_video.bin test.h264

will show you a short cg animated clip.

$ cd ../hello_audio; make; ./hello_audio.bin 1

will play a sine wave on the tv. Getting audio working over hdmi was a little tricky. The parameter ‘1’ must be added to the hello_audio.bin command. The system needs to be configured to use hdmi audio.

$ cd /boot
 $ sudo vi config.txt
hdmi_drive=2
$ sudo reboot

It would be really useful to ssh into the system so I started to look at it’s network configuration.

$ cat /etc/network/interfaces
 # Used by ifup(8) and ifdown(8). See the interfaces(5) manpage or
 # /usr/share/doc/ifupdown/examples for more information.
auto lo
iface lo inet loopback
 iface eth0 inet dhcp

So great, it’s already set up for dhcp. After plugging it into my router,

$ ifconfig
 eth0 Link encap:Ethernet HWaddr b3:27:5b:10:54:98
 inet addr:192.168.1.69 Bcast:192.168.2.255 Mask:255.255.255.0
 UP BROADCAST RUNNING MULTICAST MTU:1488 Metric:1
 RX packets:1352 errors:0 dropped:0 overruns:0 frame:0
 TX packets:677 errors:0 dropped:0 overruns:0 carrier:0
 collisions:0 txqueuelen:1000
 RX bytes:133564 (130.4 KiB) TX bytes:92981 (90.8 KiB)
lo Link encap:Local Loopback
 inet addr:127.0.0.1 Mask:255.0.0.0
 UP LOOPBACK RUNNING MTU:16436 Metric:1
 RX packets:16 errors:0 dropped:0 overruns:0 frame:0
 TX packets:16 errors:0 dropped:0 overruns:0 carrier:0
 collisions:0 txqueuelen:0
 RX bytes:1664 (1.6 KiB) TX bytes:1664 (1.6 KiB)

Great! It’s on the network and has access to dns.

$ ping www.yahoo.com
 PING ds-any-fp3-real.wa1.b.yahoo.com (72.30.2.43) 56(84) bytes of data.
 64 bytes from ir1.fp.vip.sk1.yahoo.com (72.30.2.43): icmp_req=1 ttl=51 time=27.7 ms
 64 bytes from ir1.fp.vip.sk1.yahoo.com (72.30.2.43): icmp_req=2 ttl=51 time=26.9 ms
 64 bytes from ir1.fp.vip.sk1.yahoo.com (72.30.2.43): icmp_req=3 ttl=51 time=27.1 ms
 64 bytes from ir1.fp.vip.sk1.yahoo.com (72.30.2.43): icmp_req=4 ttl=51 time=28.3 ms

I can start the windows system now:

$ startx

From the window system Midori web browser is available and able to surf the web.

It’s very slow compared to my macbook pro, but it’s just 256M ram and a little processor for $35.

I’ve set it up to run sshd and put my public key on it so I can log in remotely to develop projects on it.

sudo update-rc.d ssh defaults

Translating Javascript to Coffeescript

I’ve taken on the task of translating a few javascript modules to Coffeescript.  Here are a few regexs I found useful, using vim :

/\/\/#/g

/;$//g

/var//g

/function(\(.\{-}\))/(\1)->/g

/if\s*(\(.\{-}\))/(\1)->/g

/},$//g

/}$//g

And here are a few manual translations:

a = b ? c : d

a = if b then c else d

for( i = 0; i < n; i++ ) {

for i in [0..n-1] by 1

case ‘xyz’:

when ‘xyz’

Run coffeescript compiler with -w option to detect compilation errors.

~/node_modules/coffee-script/bin/coffee -w -o ./lib -c ./src

Move your javascript file TestFile.js to ./src/TestFile.coffee.  I commented out all lines so I can work on pieces at a time and recompile on save.

Asteroids – mass conservation

Back in college, this coinop game was one of the most frustrating to learn the controls. So this weekend I wrote a version using coffeescript and processing.js which as a few features I always wanted. Unlimited bullets, no spaceship collisions and no score. The asteriods are broken into pieces which conserve the original mass. Much finer fragments are generated also. This is being served by a node.js instance running on free no.de.

It was much easier to put together than I thought.

http://yaygi.no.de/roids

ActionMailer 3.1

It turns out that ActionMailer::Base is inherited from AbstractController::Base, so bottom line is it’s a controller.

Calling an email method is odd because you define an instance method for formatting your email, but call it as if it were a class method. Turns out that ActionMailer will use method_missing to process the missing class method. method_missing will instantiate your ActionMailer, then “process” the instance method your code appeared to be calling.

The instance method actually formats and renders an instance of Mail::Message (using your mailer’s view/method.format.erb template). The Mail::Message instance is returned by your instance method.

You can then call Mail::Message.deliver to send the email.

sending files with nginx X-Accel-Redirect

After reading several posts and digging into gem files, it turns out there are a couple ways to set up nginx to directly download files to clients, vs having your rails app processes get tied up with file download.

The least obtrusive configuration leaves my rails DownloadController very clean.

class Api::DownloadController < ApiController
  def download
    # rails has to be able to find the file. 
    send_file "/user/myname/tmp/download/#{params[:filename]}.#{params[:format]}"
 end
end

The configuration lies in the nginx.conf file. The server config needs a couple header env vars set. These are used by the Rack::Sendfile component to set the response header vars.  The response header vars are read by nginx which internally redirects nginx to download the file directly to the client.  The header var nginx is looking for is ‘X-Accel-Redirect’ and the value is an internal path to the file.  The internal path is resolved by setting up a new internal location within nginx.conf.

location /download {
root /user/myname/tmp/;
internal; #so /download is not visible to the outside world
}
location / {
proxy_set_header X-Sendfile-Type X-Accel-Redirect;
proxy_set_header X-Accel-Mapping /user/myname/tmp/download/=/download/  #maps a real path to the internal location
...
}

The request will set vars X-Sendfile-Type and X-Accel-Mapping.  These are used by Rack::Sendfile when the response from DownloadController#download is propagated up the rack stack.  On response, Rack::Sendfile checks the response and if it’s a file, it will set response header vars for you.

response.headers[‘X-Accel-Redirect’] = ‘/download/myfile.ext’

Rack::Sendfile uses the X-Accel-Mapping to map the real file path (specified in the download controller) to the internal location set in the nginx.conf (/download).  Take a look at the rack gem, sendfile.rb to see the code, it’s not complicated.

Finally, nginx does another mapping from /download to /usr/myname/tmp/download/myfile.ext and starts sending this file to the client.


The advantage of using the nginx.conf setup is that the details of who sends the file are kept out of the controller.  For example, the code

response.headers[‘X-Accel-Redirect’] = /users/myname/tmp/downloads/myfile.ext

could be added directly into the DownloadController#download method. But this assumes nginx is the server which might not be the case.  In dev mode you may be running unicorn or mongrel and never need the speed of nginx until you go to production.


References:

http://www.therailsway.com/2009/2/22/file-downloads-done-right

http://wiki.nginx.org/NginxXSendfile

Using X-Accel-Redirect in Nginx to Implement Controlled Downloads

http://andrewtimberlake.com/blog/how-to-protect-downloads-but-still-have-nginx-serve-the-files